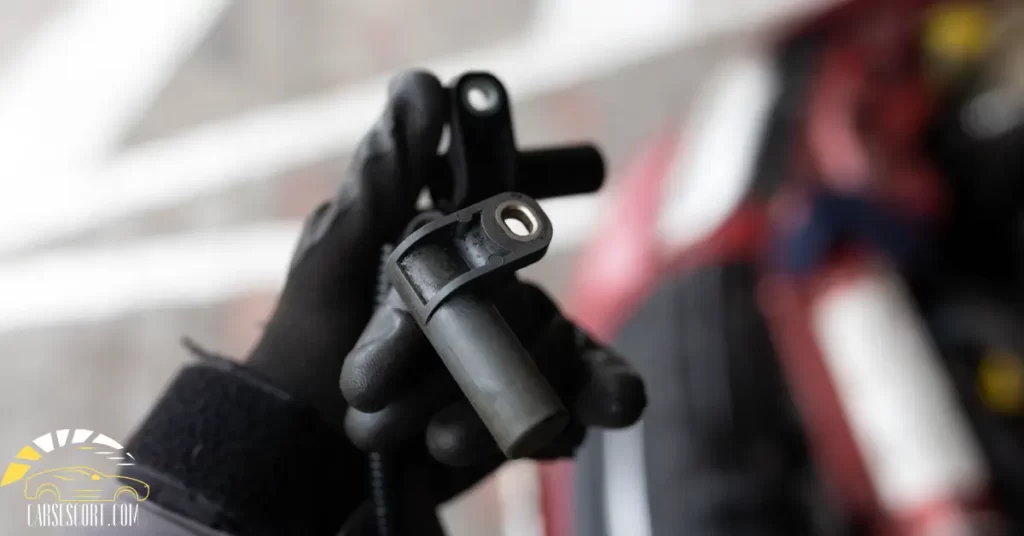
The crankshaft sensor is vital to your car’s engine management system. It detects the crankshaft’s position and speed and helps ensure the engine runs smoothly. You may wonder what to do after replacing crankshaft sensor?
After replacing the crankshaft sensor, ensure the sensor is installed correctly to avoid starting issues and prevent faulty crankshaft position sensor installation.
In this blog post, we’ll explore the steps you should take after replacing the crankshaft sensor to ensure your car runs at its best. From testing the sensor to clearing error codes, we’ll cover everything you need to know.
What To Do After Replacing Crankshaft Sensor?
After replacing the crankshaft position sensors, it is important to perform a few additional steps to ensure the engine’s proper functioning.
These steps may vary depending on the make and model of the vehicle, but some general guidelines include:
1) Check If The Crankshaft Sensor Installation Is Correct
Starting a car can be difficult after replacing the crankshaft position sensor, and this may be due to incorrect installation. Ensuring the sensor is installed correctly is important to avoid starting issues and to prevent faulty crankshaft position sensor installation.
To properly replace the crankshaft sensor, following the manufacturer’s guidelines and comparing your installation process with it is important.
Retracing your steps can help you identify any mistakes made during installation. If an error is detected, rectify it immediately, and the problem should be resolved.
2) Clear The Code Manually With OBD-2 Diagnostic Scanner
The new crankshaft sensor should resolve any error codes related to the previous faulty sensor. However, it’s a good practice to clear the error codes from the engine control module (ECM) using an OBD-II scanner.
3) Take The Vehicle For A Test Drive
Take the vehicle for a test drive to ensure the sensor functions properly. Pay attention to abnormal engine behavior, such as rough idling, stalling, or hesitation during acceleration.
If you notice any issues, it may indicate a problem with the installation or the sensor itself.
4) Monitor Performance Of The Vehicle
After the test drive, monitor the engine’s performance for the next few days. Keep an eye out for any warning lights or codes that may reappear.
5) Ensure The Harness And Connections Are Properly Secured
When you replaced crankshaft position sensor ensure the engine wiring harness and connections are properly secured and not damaged.
A loose or damaged connection or faulty crankshaft sensors can cause the sensor to malfunction and affect ignition timing.
6) Focus on Regular Maintenance
Regular maintenance is important to keep the engine running smoothly. Follow the manufacturer’s recommended maintenance schedule, which may include replacing the sensor again after a certain mileage or time interval.
How Long Does It Take To Replace The Crankshaft Sensor?
In general, replacing the crankshaft sensor can take anywhere from 3 to 6 hours. However, it may take longer if other components need to be removed to access the sensor or if there are any complications during installation.
The time it takes to replace the crankshaft sensor can vary depending on the make and model of the vehicle, as well as the experience level of the person performing the replacement.
It is important to note that the time it takes to replace the crankshaft sensor should not be rushed. Proper installation is crucial to ensure the sensor functions correctly and avoid future issues.

You May Also Like To Read:
- What Happens If You Don’t Relearn Crankshaft Position Sensor?
- Benefit of Having Two Names on Car Title
What Are Problems After Replacing Crankshaft Position Sensor?
While replacing the crankshaft position sensor can resolve many engine-related issues, some potential problems may occur after the replacement. These issues may include:
- If the sensor is not installed properly, it may cause starting issues, such as difficulty starting or stalling.
- Improper crankshaft sensor installation in learning process can cause the engine to run poorly, leading to decreased power, rough idling, or hesitation during acceleration.
- Even after replacing the sensor, the check engine light may still be illuminated due to a related issue such as a faulty wiring harness, damaged ECM or problems with the timing or ignition system.
- Sometimes, the symptoms that led to replacing the sensor may have been caused by other issues, and replacing the sensor may not resolve the issue. It’s essential to diagnose the root cause of the issue to ensure that replacing the sensor is necessary.

How to Reset the Crankshaft Position Sensor Manually?
Resetting the crankshaft position sensor manually is a simple process that can be done in a few steps. This procedure is necessary when the sensor malfunctions and the engine control unit provides incorrect data.
Follow the steps below to reset the sensor and ensure smooth engine performance.
- Turn off all accessories and make sure that the air temperature sensor and coolant temperature are within 5 degrees Celsius of each other. Start the engine and idle in either park or neutral for two minutes.
- Accelerate the vehicle to 55 mph at part throttle and maintain this speed for 8-10 minutes until the engine reaches its operating temperature.
- Continue cruising at 55 mph for another 5-6 minutes.
- Decelerate to 45 mph without braking and maintain this speed for 1 minute.
- Perform 4 deceleration cycles, each lasting 25 seconds, without using the brakes. Return to 45 mph for 15 seconds between each cycle.
- Accelerate to 55 mph and cruise for 2 minutes.
- Finally, stop the vehicle and idle for 2 minutes with the brake applied and the transmission in a drive (for automatic transmission) or neutral (for manual transmission) with the clutch depressed.
It is important to note that while these crank relearns instructions apply to most vehicles, they may not apply to all. However, they provide a general guideline for the procedure that is typically followed for most cars.
How To Reset Crankshaft Position Sensor With Scanner?
Resetting the crankshaft position sensor with a scanner is a relatively simple process that can be accomplished by following the guidelines below. While these instructions may vary slightly depending on the make and model of your vehicle, they provide a general framework for the procedure.
Before beginning, it is important to connect a scanner to ensure no trouble codes are stored in the computer’s memory. Suppose any power train trouble codes other than P1336 (Crankshaft Position Variation not learned) exist.
In that case, the computer will disable the relearn function until the problem that caused the code has been resolved. Ensure that the engine coolant and oil levels are acceptable.
- Set the parking brake and block the drive wheels, ensuring the hood is closed.
- Start the engine and ensure the coolant temperature is at least 158 degrees Fahrenheit (70 degrees Celsius).
- Turn the engine off for at least 10 seconds.
- Select your scanner’s crankshaft position variation learn procedure (CASE Learn).
- Ensure that the transmission is in a park and start the engine.
- Apply the brakes and hold the pedal firmly.
- Follow the instructions provided by the scanner to complete the relearn procedure.
FAQ
Can I Replace A Crankshaft Position Sensor Myself?
Replacing a crankshaft position sensor is possible to do by yourself, but it requires some technical knowledge and skill. If you have experience working with car engines, you can attempt to replace them.
However, if you are not confident in your ability, it is recommended to seek the help of a professional mechanic.
Does A Crankshaft Sensor Have To Be Programmed?
A crankshaft position sensor does not need to be programmed in most cases. However, there are some car models where the sensor does require programming after installation.
It is essential to check the owner’s manual or consult a mechanic to determine whether or not programming is necessary.
How Does The Crankshaft Position Sensor Work?
The crankshaft position sensor monitors the position and speed of the crankshaft in the engine. It works by using a magnetic field to detect the movement of the crankshaft.
The sensor sends signals to the car’s computer, which then uses the information to control the engine’s timing and fuel injection.
What Are the Causes A Car Won’t Start After Replacing Crankshaft Position Sensor?
There are several reasons why a car may not start after replacing the crankshaft position sensor. One common cause is an incorrect installation, where the sensor is not aligned correctly.
Another reason could be a damaged or faulty sensor, which can occur during installation or due to other factors.
It is important to double-check the installation and troubleshoot other potential issues before assuming that the sensor is the cause of the problem.
What Happens If You Don’t Relearn Crankshaft Position Sensor?
If you do not relearn the crankshaft position sensor after replacing it, the car’s computer may not be able to accurately determine the position and speed of the crankshaft. This can result in poor engine performance, misfiring, and even stalling.
Relearning the sensor involves resetting the computer’s memory and teaching it to recognize the new sensor’s signal. Following the manufacturer’s instructions carefully when relearning the sensor is essential.
Affiliate Disclosure: Cars Escort is a participant in the Amazon Services LLC Associates Program. As an Amazon Associate, we earn from qualifying purchases made through affiliate links on our site. Read Our Disclaimer .

