
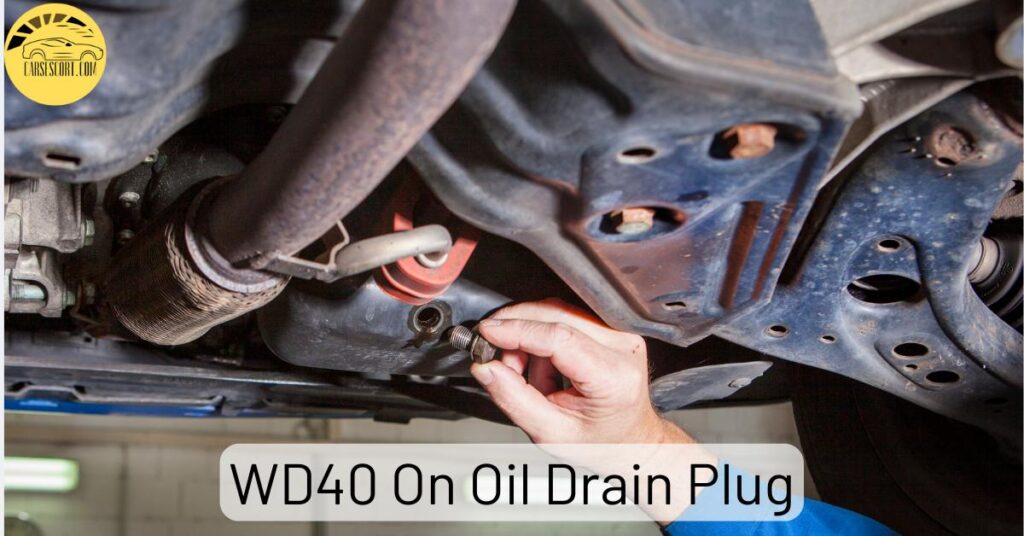
Maintaining a vehicle’s engine is crucial for its optimal performance and longevity. Regular oil changes play a significant role in this maintenance routine. The oil drain plug is an essential component when it comes to oil changes. However, some confusion surrounds whether it is appropriate to use WD-40 on an oil drain plug.
-
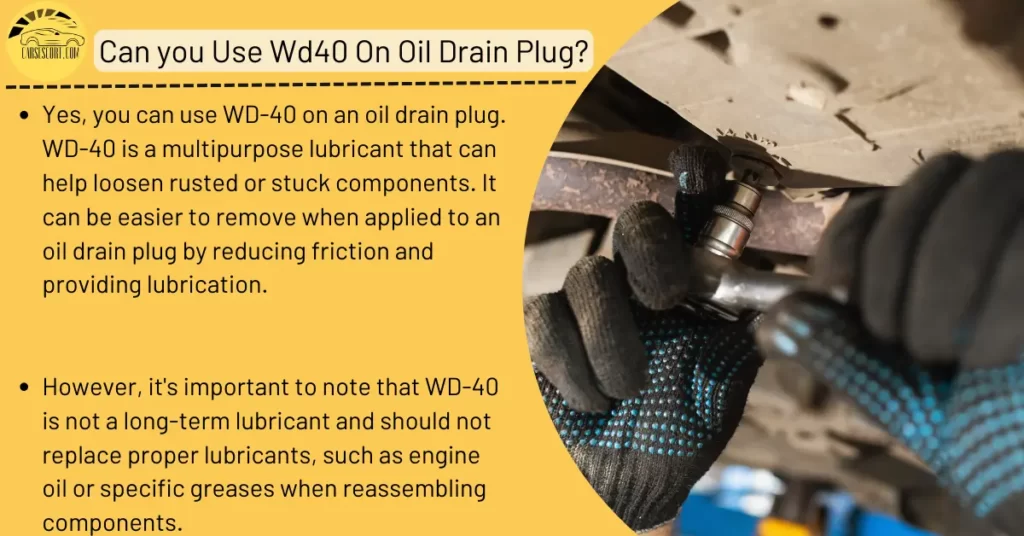
Can you Use Wd40 On Oil Drain Plug?
-
Yes, you can use WD-40 on an oil drain plug. WD-40 is a multipurpose lubricant that can help loosen rusted or stuck components. It can be easier to remove when applied to an oil drain plug by reducing friction and providing lubrication.
-
However, it’s important to note that WD-40 is not a long-term lubricant and should not replace proper lubricants, such as engine oil or specific greases when reassembling components.
-
After removing the oil drain plug, cleaning it thoroughly and applying a new seal or gasket before reinstalling it is recommended.
The oil drain plug is crucial in an engine’s lubrication system. It is responsible for sealing the oil pan, preventing leaks, and ensuring the proper oil flow. During an oil change, the drain plug is removed to drain the old oil from the engine.
This article will debunk the myths and provide valuable insights on using WD-40 and useful maintenance tips for your oil drain plug.
WD-40 on Oil Drain Plug
WD-40 is primarily penetrating oil to loosen rusted or stuck components. It can effectively free bolts, hinges, and other mechanical parts. However, it is important to note that WD-40 is not a long-lasting lubricant or a substitute for engine oil.
Its low viscosity and evaporation rate make it unsuitable for use on oil drain plugs, which require a high-temperature, heavy-duty lubricant.
How To Use WD-40 To Remove Oil Drain Plug?
To use WD-40 to remove an oil drain plug, follow these steps:
-
Make sure the engine is cool before starting. If you recently ran your vehicle, give it time to cool down to avoid burns.
-
Get a can of WD40 and a suitable wrench or socket set that fits the oil drain plug.
-
Shake the can of WD-40 well, then spray a generous amount onto the oil drain plug. Focus on spraying around the base of the plug and where it connects to the oil pan.
-
Allow a few minutes for the WD40 to penetrate and loosen any rust or debris.
-
Place the wrench or socket onto the oil drain plug and apply steady but gentle pressure in an anticlockwise direction (lefty-loosey). Be careful not to strip the bolt. If it’s challenging to turn, try using a breaker bar for additional leverage.
-
If the drain plug doesn’t budge, apply more WD-40 and allow it to sit for a few more minutes. This extra time will help penetrate further and loosen the plug.
-
Once the oil drain plug starts moving, turn it anticlockwise until it comes off completely. Do not drop the plug into the oil pan or onto the ground.
-
Inspect it for any damage or excessive wear once the plug is removed. If necessary, replace it with a new plug. Clean the plug with a rag or paper towel before reinstallation if the plug is reusable.
Important note: WD-40 is not a lubricant for reassembling the oil drain plug. It is primarily used for loosening and removing stuck or rusty parts. When reinstalling the drain plug, use an appropriate lubricant or thread sealer recommended by your vehicle manufacturer to ensure a proper seal.
Proper Maintenance Tips for Your Oil Drain Plug
It is crucial to follow proper maintenance practices to ensure the longevity and performance of your oil drain plug.
Here are a few essential tips:
-
Use the correct torque specification when tightening the drain plug during an oil change.
-
Inspect the drain plug and washer for damage or wear regularly.
-
Clean the drain plug and the oil pan threads to remove any debris before reinstalling.
-
Replace the drain plug washer if it shows signs of wear or damage.
-
Avoid overtightening the drain plug, leading to stripped threads or a damaged oil pan.
-
Follow the recommended oil change intervals specified by your vehicle manufacturer.
-
Always use high-quality engine oil and a compatible oil filter during oil changes.
What To Do if Drain Plug Is Stuck?
If the drain plug is stuck, you can try the following steps:
-
Apply penetrating oil or lubricant to the plug and let it sit for some time.
-
Use a proper-sized wrench or socket to apply gradual and even pressure while attempting to loosen the plug.
-
Tap the wrench lightly with a hammer to help break loose any corrosion.
-
If all else fails, consult a professional mechanic to avoid causing further damage.
How Do You Remove an Oil Drain Plug Without Spilling Oil?
To remove an oil drain plug without spilling oil, follow these steps:
-
Make sure the engine is cool and the vehicle is parked on a level surface.
-
Place an oil drain pan or container beneath the drain plug.
-
Carefully loosen the drain plug using a wrench, keeping it aligned with the pan to prevent oil from splashing.
-
Slowly unscrew the plug by hand, allowing the oil to flow into the pan.
-
Once the oil has drained completely, clean the plug and reinstall it, tightening it to the recommended torque specification.
Step-by-Step Guide to Changing Your Oil
Performing an oil change is a fundamental vehicle maintenance task. While the oil changing process may vary depending on your vehicle, here is a general guide to changing your oil:
-
Gather the necessary tools and materials, including a socket wrench, oil filter wrench, new oil filter, new oil, a drain pan, and gloves.
-
Safely raise your vehicle using jack stands or ramps, ensuring it is stable and secure.
-
Locate the oil drain plug, position the drain pan beneath it, and carefully loosen and remove it to drain the old oil.
-
Once all the oil has been completely drained, replace the drain plug and tighten it to the recommended torque specification.
-
Use an oil filter wrench to remove the old and rusty filter, draining any remaining oil into the drain pan.
-
Apply a small amount of clean oil to the rubber gasket on the new oil filter, then install it by hand, ensuring it is securely tightened.
-
Locate the oil filler cap on the top of the engine and remove it.
-
Pour the recommended amount and type of new oil into the engine through the oil filler port.
-
Replace the oil filler cap and start the engine, allowing it to run for a few minutes to circulate the new oil.
-
Turn off the engine and check the oil level using the dipstick. Adjust the oil level if necessary.
-
Clean up spills or drips, and properly dispose of the old oil and oil filter at a designated recycling center.
Signs of a Damaged Oil Drain Plug
-
Oil leaks around the drain plug area.
-
Difficulty in tightening or loosening the drain plug.
-
Stripped or damaged threads on the drain plug.
-
Visible cracks, corrosion, or deformities on the drain plug.
-
Excessive oil consumption or low oil pressure.
Replacing an Oil Drain Plug: DIY or Professional Service?
Replacing an oil drain plug can be straightforward for those with some mechanical knowledge and experience. However, if you are unsure or uncomfortable performing the replacement yourself, it’s always recommended to seek the assistance of a professional mechanic.
They have the expertise and specialized tools to ensure the job is done correctly and safely.
The Importance of Using the Right Tools for Oil Drain Plug Maintenance
Using the right tools for oil drain plug maintenance is crucial to ensure proper installation and avoid damage. Investing in a high-quality socket wrench, torque wrench, oil filter wrench, and other necessary tools will make the process easier and help prevent issues such as stripped threads or overtightening.

You May Also Like To Read:
- Why Should You Be in The Proper Gear Before Starting Down a Hill?
- Toyota Braking Power Low Stop In A Safe Place Error
FAQ
Can you reuse oil drain plug?
Whether you can reuse an oil drain plug depends on its condition and the manufacturer’s recommendations. In general, it is possible to reuse a drain plug if it is in good condition, with no signs of damage or wear. However, it is always recommended to inspect the plug carefully before reusing it.
If there are any doubts about its integrity, it’s best to replace it with a new one to ensure a proper seal.
How tight should oil plug be?
The oil plug should be tightened according to the manufacturer’s specifications. Over-tightening can damage the oil pan or strip the threads, while under-tightening can lead to oil leaks. It is advisable to use a torque wrench to achieve the correct tightness.
Typically, oil drain plugs are tightened to around 25-30 foot pounds (33-40 Nm), but it’s important to consult the vehicle’s manual or contact the manufacturer for the exact torque specification.
Can I use silicone on oil drain plug?
It is generally not recommended to use silicone on an oil drain plug. Silicone sealants are not designed for this purpose and may not withstand the high temperatures and pressures involved in the oil system.
Instead, it is best to rely on the appropriate sealing washer or gasket provided with the drain plug or follow the manufacturer’s recommendations for sealing the plug.
My Final Thoughts
In conclusion, using WD-40 on an oil drain plug is not recommended. While WD-40 has its uses for various applications, it is not suitable for the high-temperature and high-pressure environment of an engine’s oil system.
Instead, focus on proper maintenance practices such as using the correct torque specification, regular inspections, and replacing the drain plug washer when necessary. By following these guidelines and performing oil changes correctly
Affiliate Disclosure: Cars Escort is a participant in the Amazon Services LLC Associates Program. As an Amazon Associate, we earn from qualifying purchases made through affiliate links on our site. Read Our Disclaimer .